Display tool
Seating Chart
Drag-and-drop seating, on display.
Arrange the room in rows, pods, or any layout, then show it on the board so students find their spots fast. Shuffle when you need a change.
Free with every TeacherStack account
On the classroom display
How it works
Seating Chart in three steps
Here’s the whole flow, start to finish.
1
Build the layout
Set up rows, pods, or a custom shape to match your room.
2
Place students
Drag names into seats, or auto-arrange and tweak from there.
3
Show or shuffle
Display the chart so students settle quickly — reshuffle anytime.
Set the room the way you want it
Rearranging the class should take a minute, not your planning period.
Rows, pods, your call
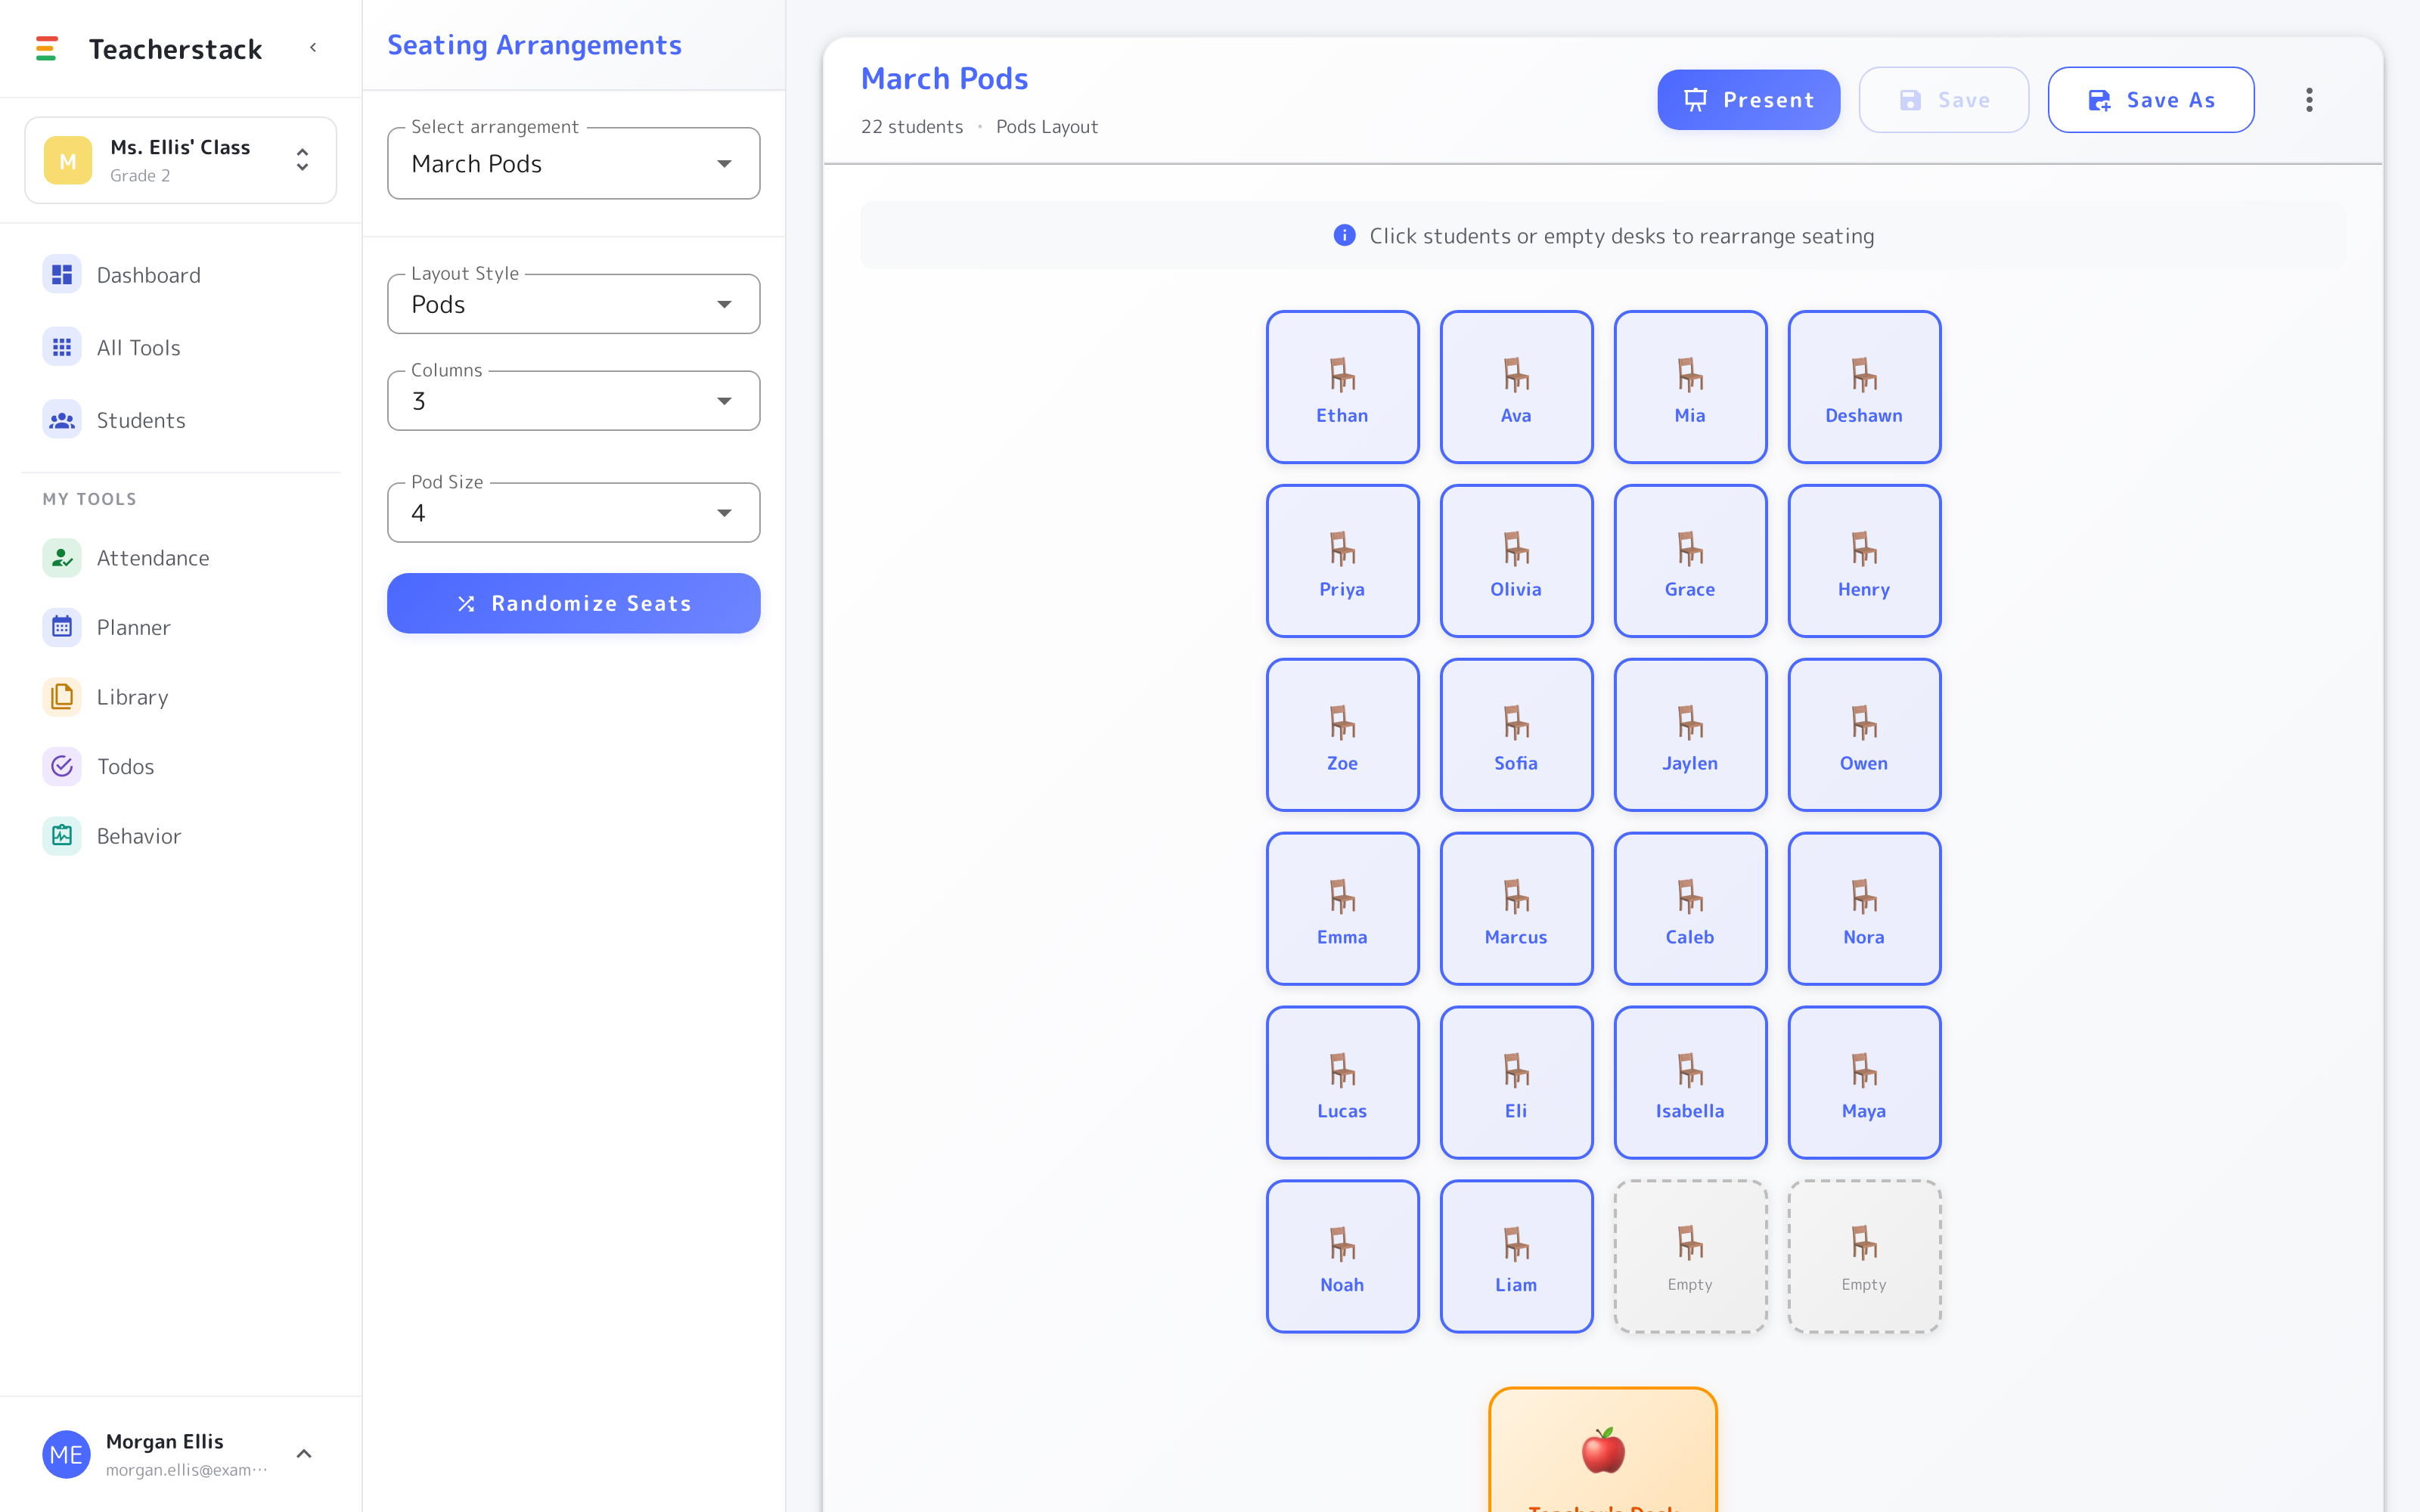
Switch between rows and pods and dial in columns and pod size until it matches your room.
Rearrange with a tap
Tap two students to swap them, or drop someone into an empty desk — the chart updates instantly.
Shuffle in a tap
Randomize Seats mixes the whole room for a fresh arrangement in seconds.
Save every version
Keep named arrangements — “March Pods,” test rows — and switch between them whenever.
The seating editor
Arrange the room in minutes
Set a layout, tweak who sits where, and save it — then send the finished chart to the board.
- 1Rows or pods, your choicePick a layout style and set columns and pod size until the chart matches your real classroom.
- 2Click to rearrangeClick any two desks to swap students, or drop someone into an empty seat — the chart updates as you go.
- 3Save and presentKeep named arrangements like “March Pods,” then Present the chart on the board so students can find their own seats.
Lives on the whiteboard
Put the chart on the board at the start of class so students find their spots in seconds — and reshuffle live, in front of everyone, when you need a change.
Get Seating Chart and the whole stack
One free account includes every TeacherStack tool.
Sign up — it's free